Some cool eye make up tutorial images:
Jazzing Up Your Image – The Process

Image by Boogies with Fish
www.messersmith.name/wordpress/2011/04/22/jazzing-up-your…
Once again, as you read this, I will likely have been stuffed into a long metal tube with a huge mob of other flesh and bone humans and am presently leaving a trail of noxious fumes across the frigid night sky between Honolulu and Phoenix. At Phoenix, I’ll hustle from one winged meat wagon to another and arrive, hungry, tired and lonely in Indianapolis. I pray the ground will not be white. I’ll be greeted by an old friend who will house and feed me for my time in Indy. My life today depends pretty much on the love of friends. That’s a good thing. It keeps me going, sometimes even when I’d rather not go.
Faithful reader DogsDon’tPurr commented that she would like to see some step-by-step illustrations of how a digital image is processed in order to produce a more pleasing image, according to the likes of the photographer. I had to think that over for all of five minutes. I’m pretty much running out of material here in Honolulu, so I grabbed a couple of illustrative images from my camera and recorded intermediate steps in my processing so that I can show the steps which I take to prepare my images for presentation. If you feel yourself getting drowsy, switch to another channel.
I don’t suggest that my method of working with images is any better than anyone else’s. Each image maker needs to tailor a sequence which feels right. I used Photoshop for these images, but similar results can be achieved with any image manipulation program, providing it has tools sufficient for the task.
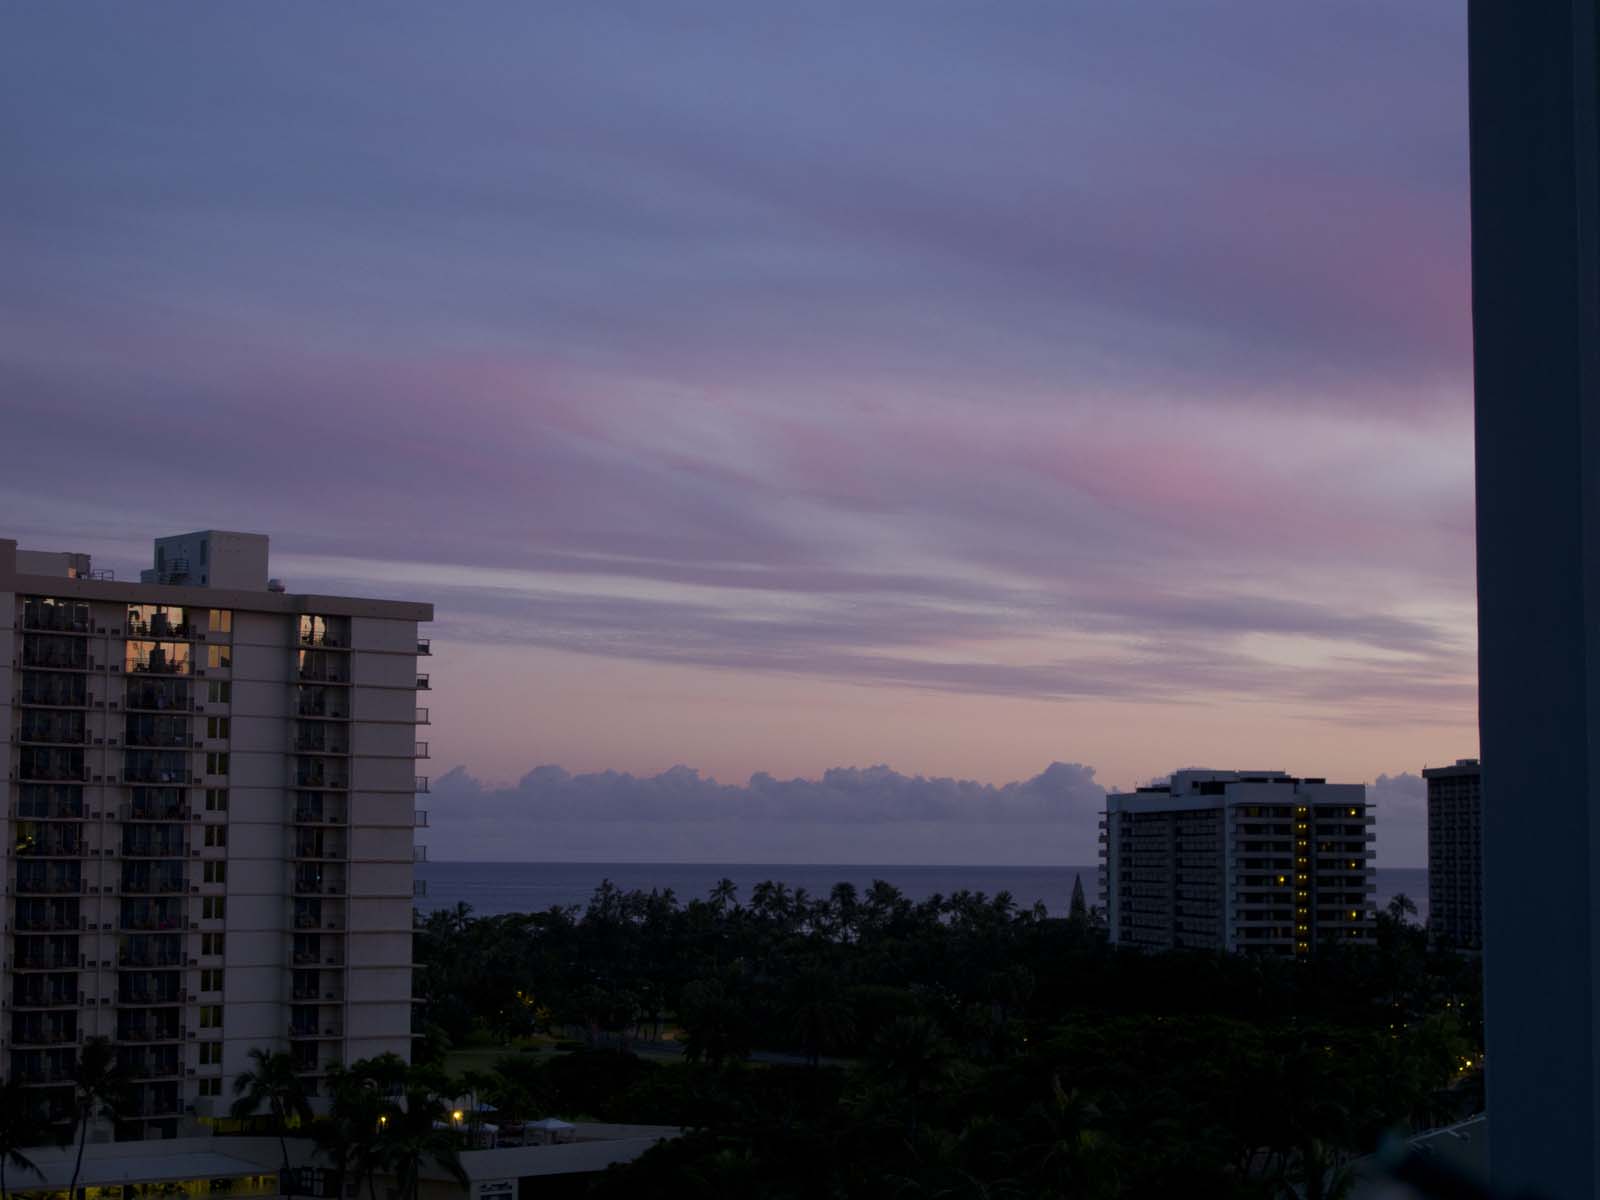
I chose the first image to make a point. The shot as it comes from the camera does not need to be perfect. That’s why we have software to fix them. Practically nothing gets from my camera directly to these pages. I fiddle with every image until I’m happy with it. I took this yesterday evening at sunset from the apartment of a friend:
As it is, it’s a throw-away. There are so many problems with it that I’d bore you to list them. In fact, it’s so bad that I knew from experience that I would never end up with an image which looked "natural", so I had it in mind from the beginning to go for the "vintage postcard" look. With an image like this, that’s what you’ll end up with anyway, so it’s best to just go with the flow.
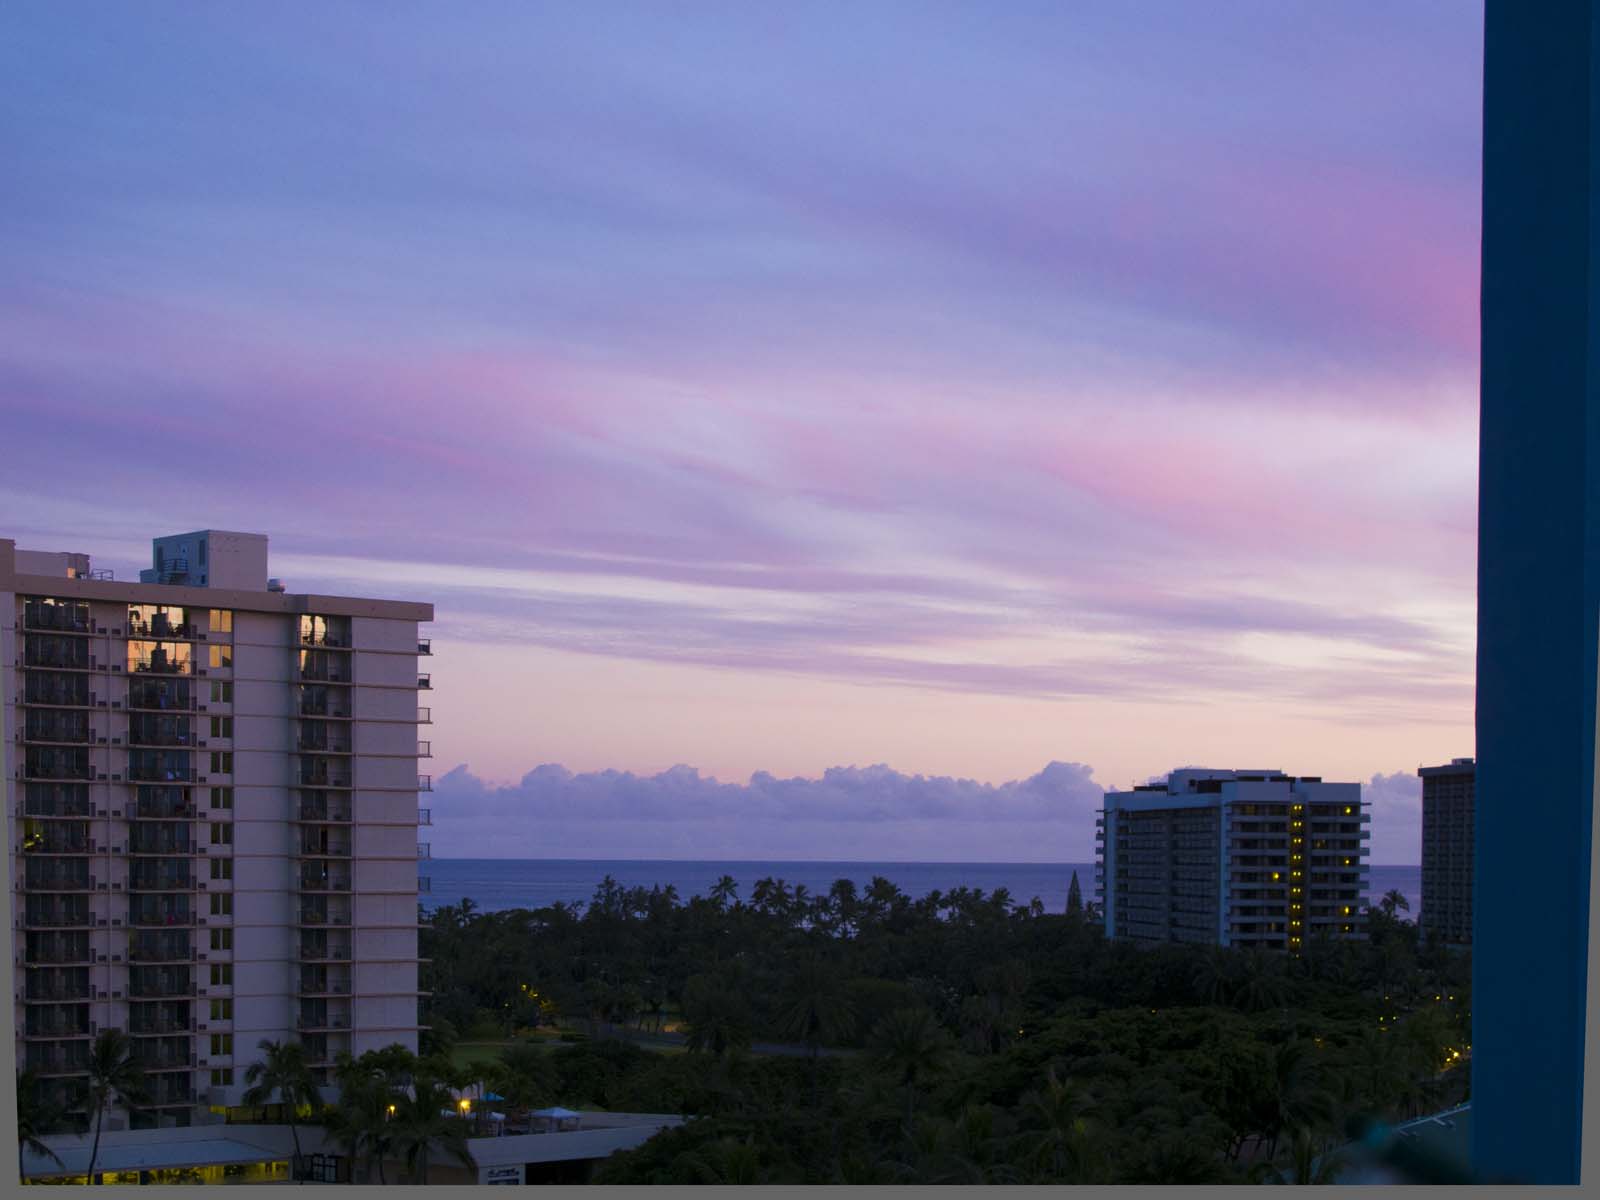
First I lightened it up a bit and straightened the buildings.
Next, I had to decide what portion of the image I really wanted in the finished product. I used a cropping tool to remove the obtrusive building to the right and a little of the building on the left along with some of the bottom of the shot:
Now that I look at it on the page, I wish I’d removed the small building on the right also. I could easily make it vanish, but I’ll leave that for another time. What’s left is what I want to show. That’s cropping.
Then I lightened up the lower part of the image because all detail was buried in the shadows. Photoshop has a special tool for lightening up dark parts and darkening light parts in the same operation. I use it often for such images:
Now I can see some detail in the dark part at the bottom, but the colour is dismal.
So, I go to work on it with a tool that allows me to modify the hue of selected colours. I’m dealing mostly with green, so I need to take magenta out and add lots of cyan and yellow:
In the same operation I also took some cyan out of the red, which richend and warmed the sky a bit. The greens are now much brighter, but there is already an artificial look to the image, because I’m trying to create something from nothing. Now we’re crossing over into interpretation. I’m making it up as I go.
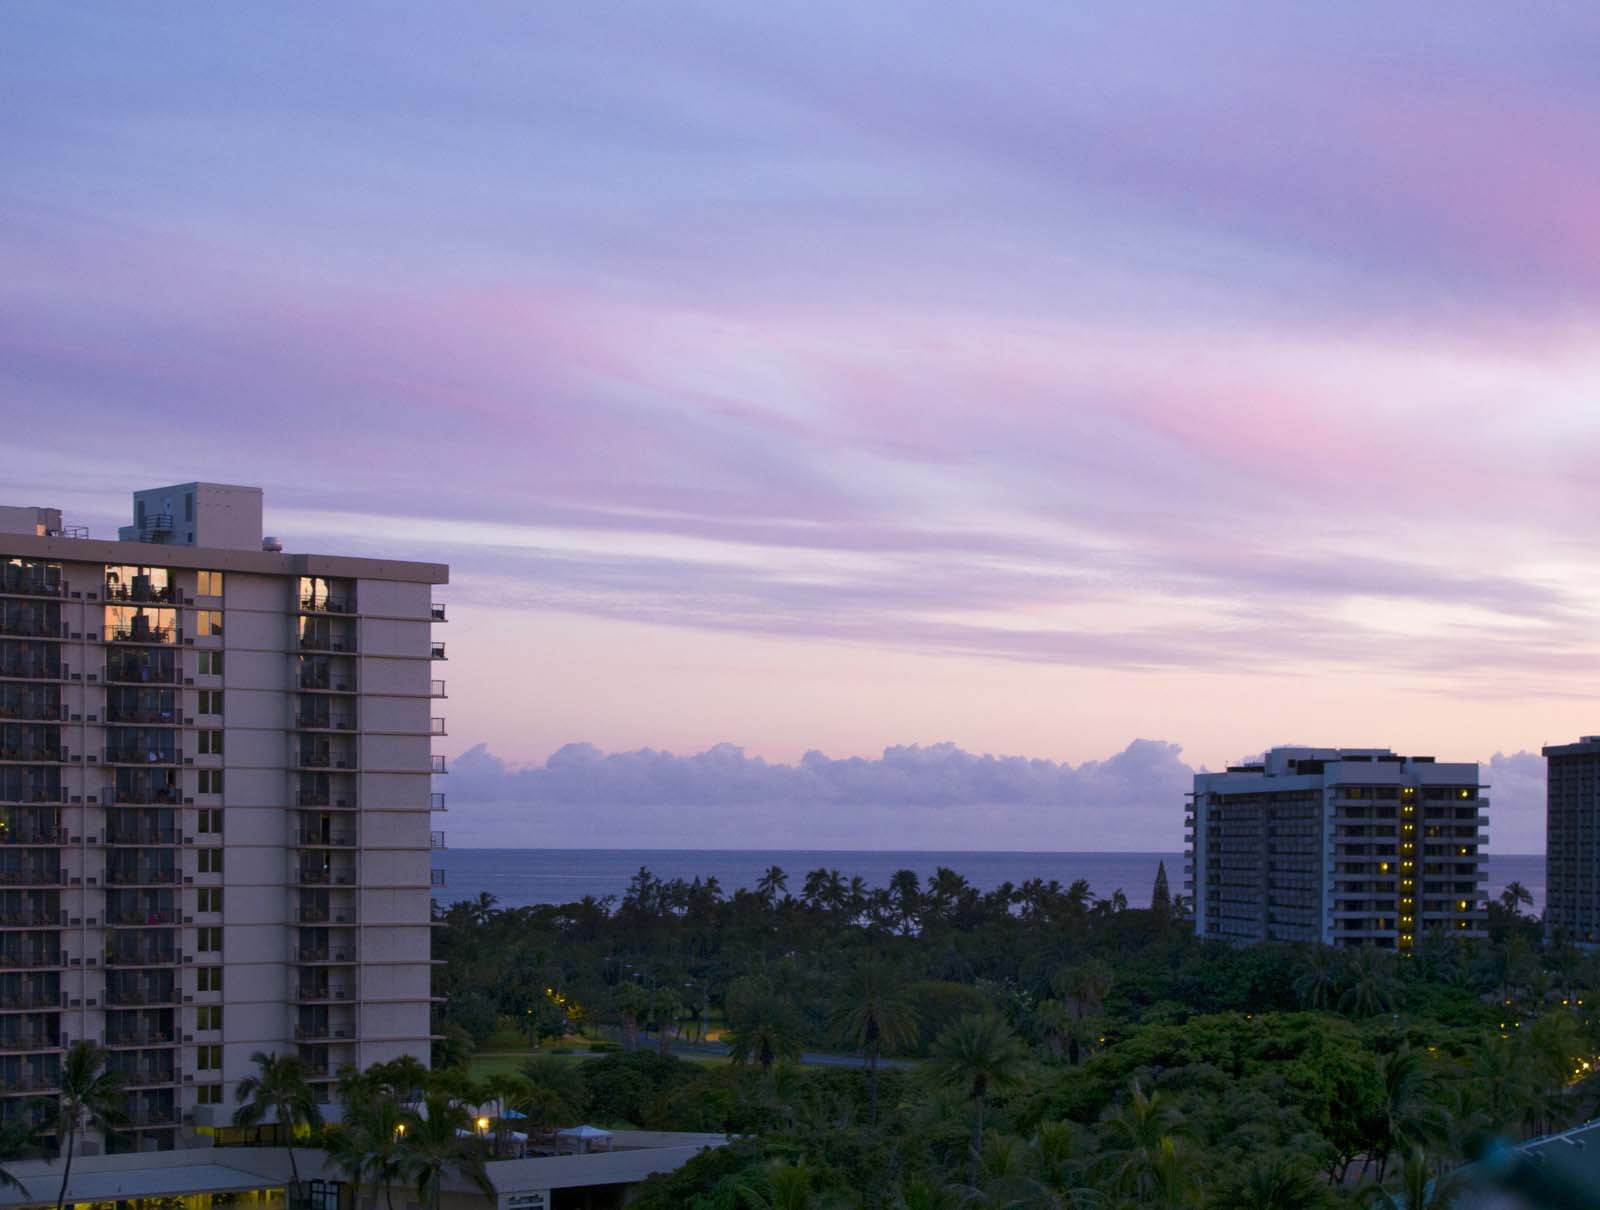
Next, I lightened the entire image. Then I used a special selection tool in Photoshop to select only the sky and I increased the saturation and contrast. This livened up the sky considerably:
I also lightened up the buildings and increased the contrast to give them some depth. In this step I had to fix each little balcony on the building on the left. Some of them had furniture on them. I removed it all. You may have to click to enlarge to see what I’m talking about. You may note that I brightened up the lights in the buildings.
After looking at the image for a while I decided I may as well go the final step in jazzing it up. I did not like the strong blue cast in the clouds on the horizon, so I desaturated them to make them grey, leaving just the tops bluish. I also selected the top third of the image and made a graduated edge on the selection (I "faded" it on the bottom edge). I darkened this area to make the sky more dramatic. It’s an old movie trick:
There we have it. A "Vintage Postcard" shot from Honolulu. And, this proves the point:
Aloha.
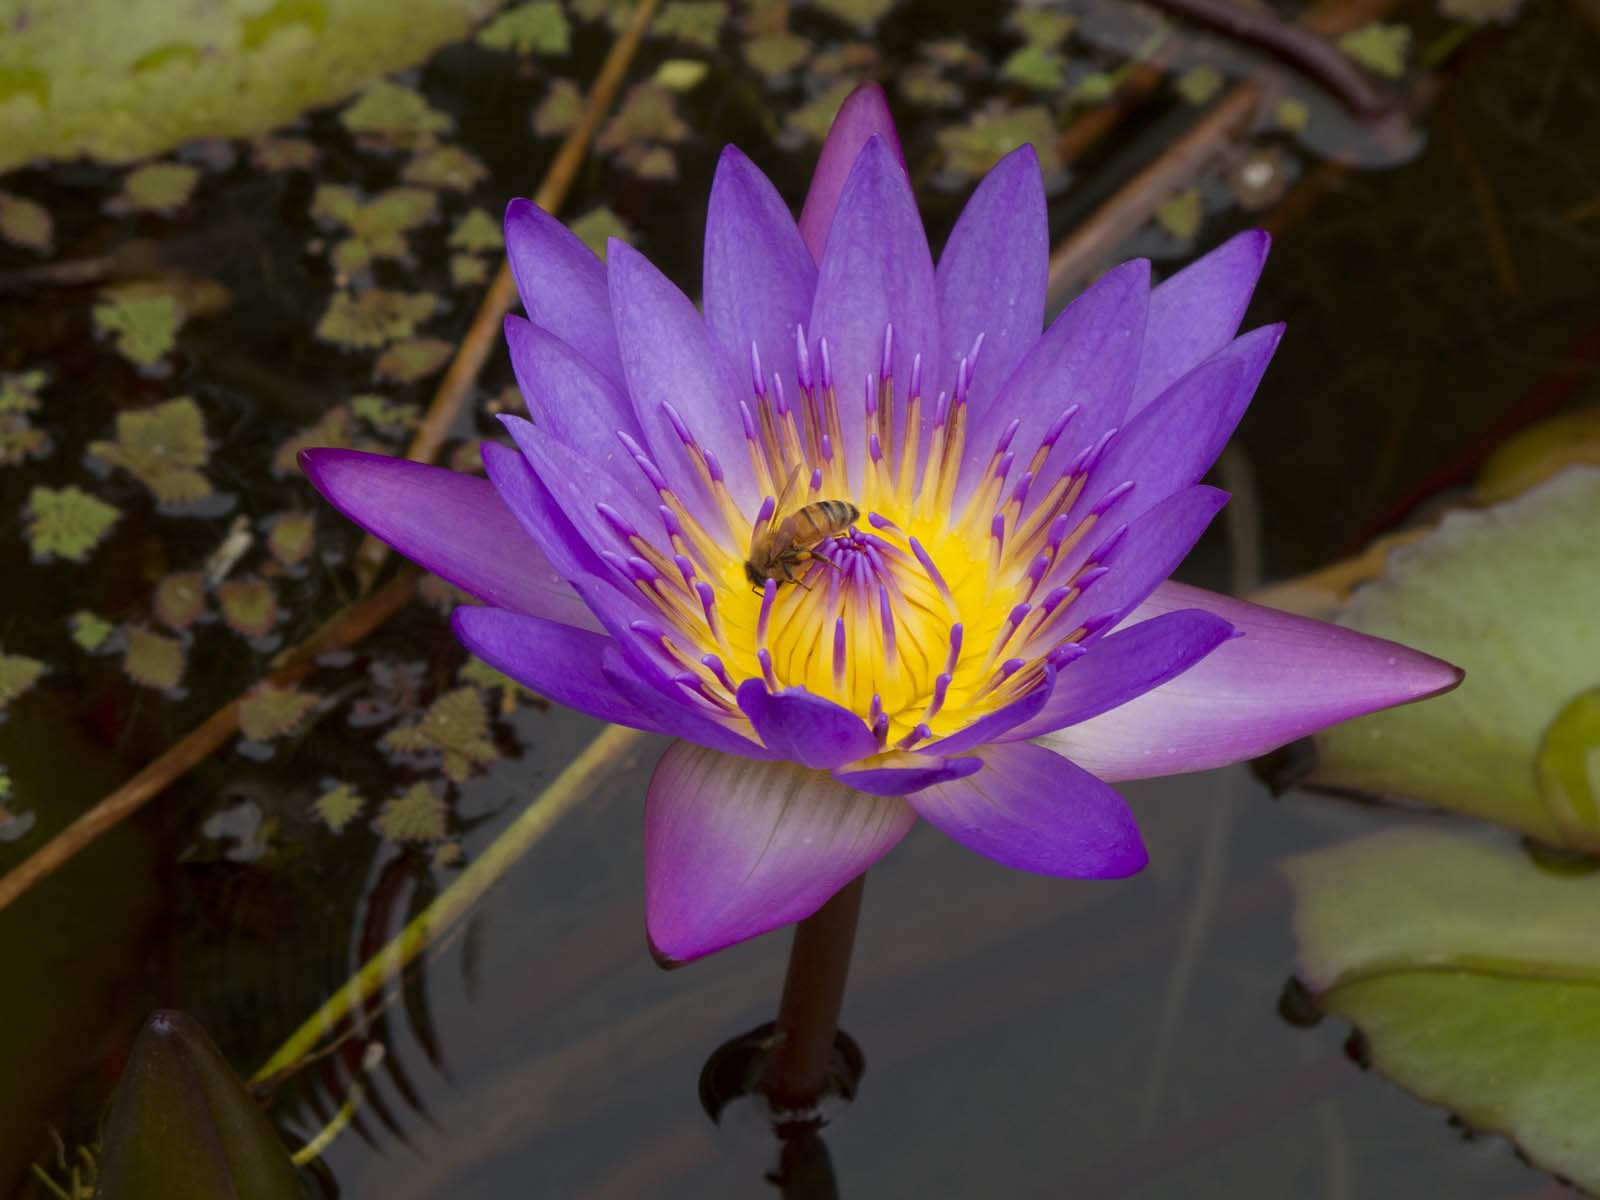
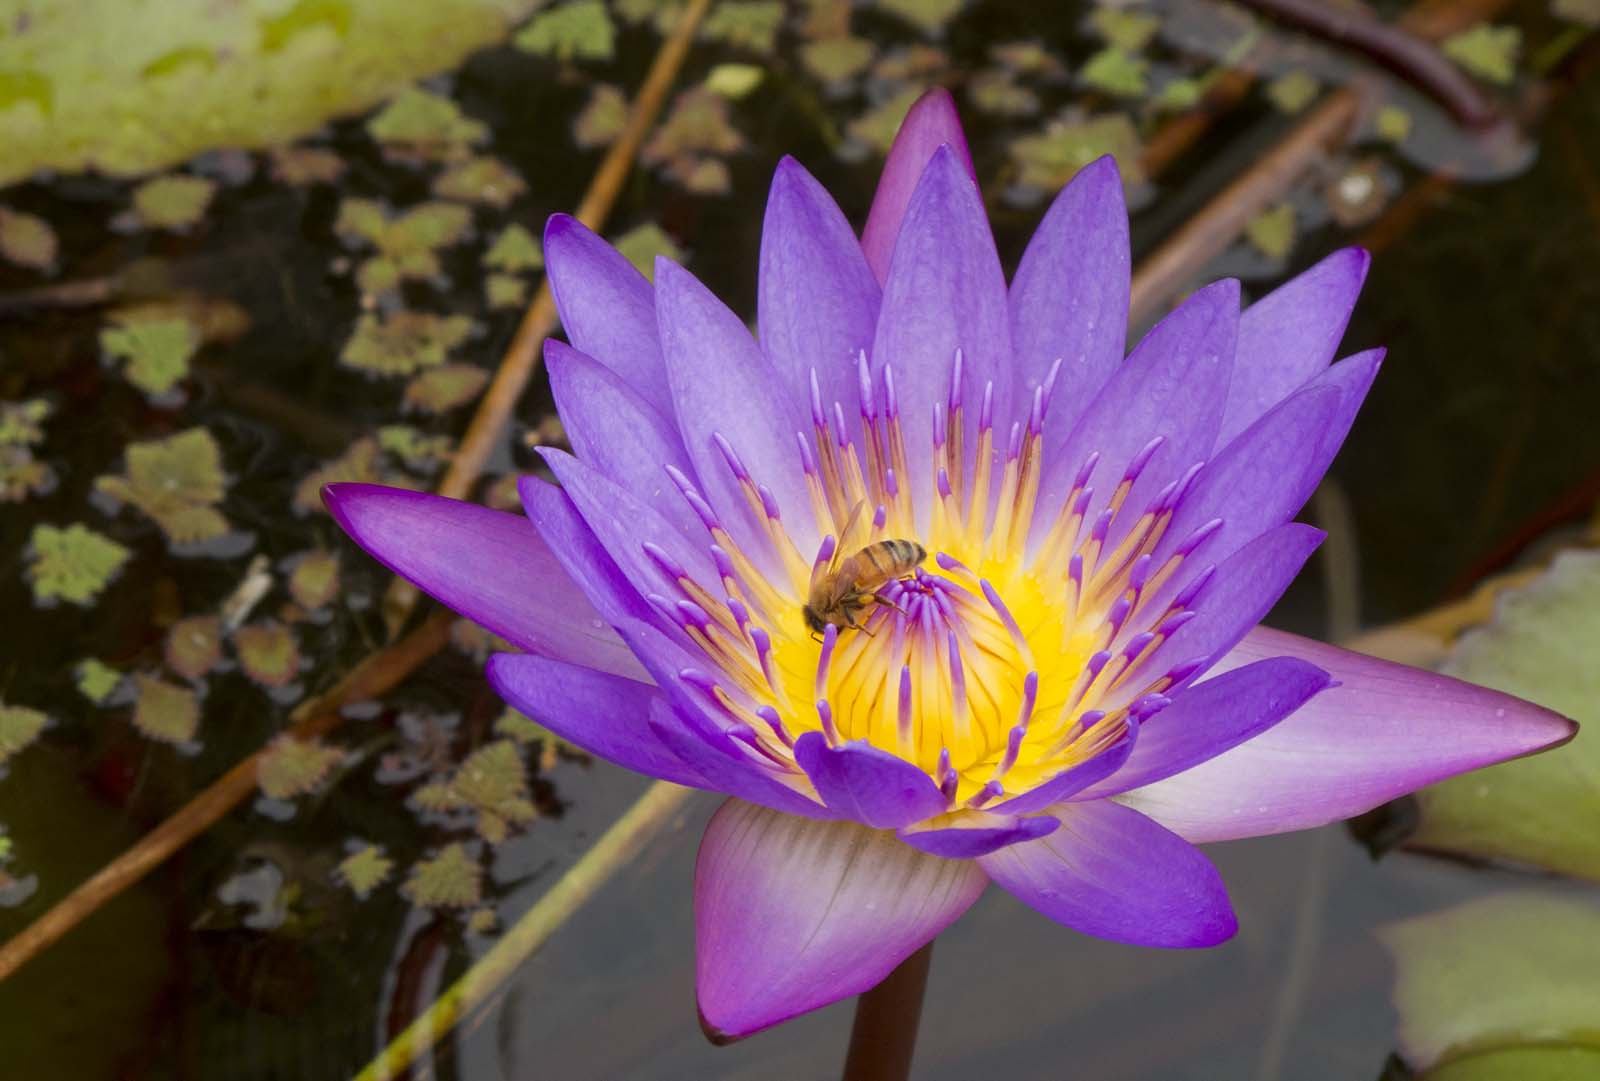
For the next demo, I decided to use an example of an image which is not so shabby right out of the camera. You could print this water lily shot and put it in your photo album with reasonable pride. It’s a "lucky" shot:
Ah, some, however, are never satisfied. I can see the possibilities, but it needs some work. This is a sister image to one I put on these pages a while ago. The bee is just facing the other way.
First, I brightened up the entire image and cropped it so that it conforms more to my sense of composition which is biased strongly towards the Rule of Thirds (if you don’t know, you can use my search box):
On my Canon G11 I tend to shoot images slightly underexposed as it seems to give me better saturation of the colours. Maybe I’m dreaming. It’s just a feeling. I haven’t done any side-by-side comparisons to prove it. While I’m rambling photographically, I’ll mention that I’m going crazy trying to edit images on this five year old Toshiba notebook. The screen is horrible. The slightest change of angle changes the contrast drastically and the room lighting makes a dramatic difference. I know the quality of my images has suffered since I left my huge, high quality graphics monitor in Madang. It’s an ancient Sony CRT terminal, but I love it.
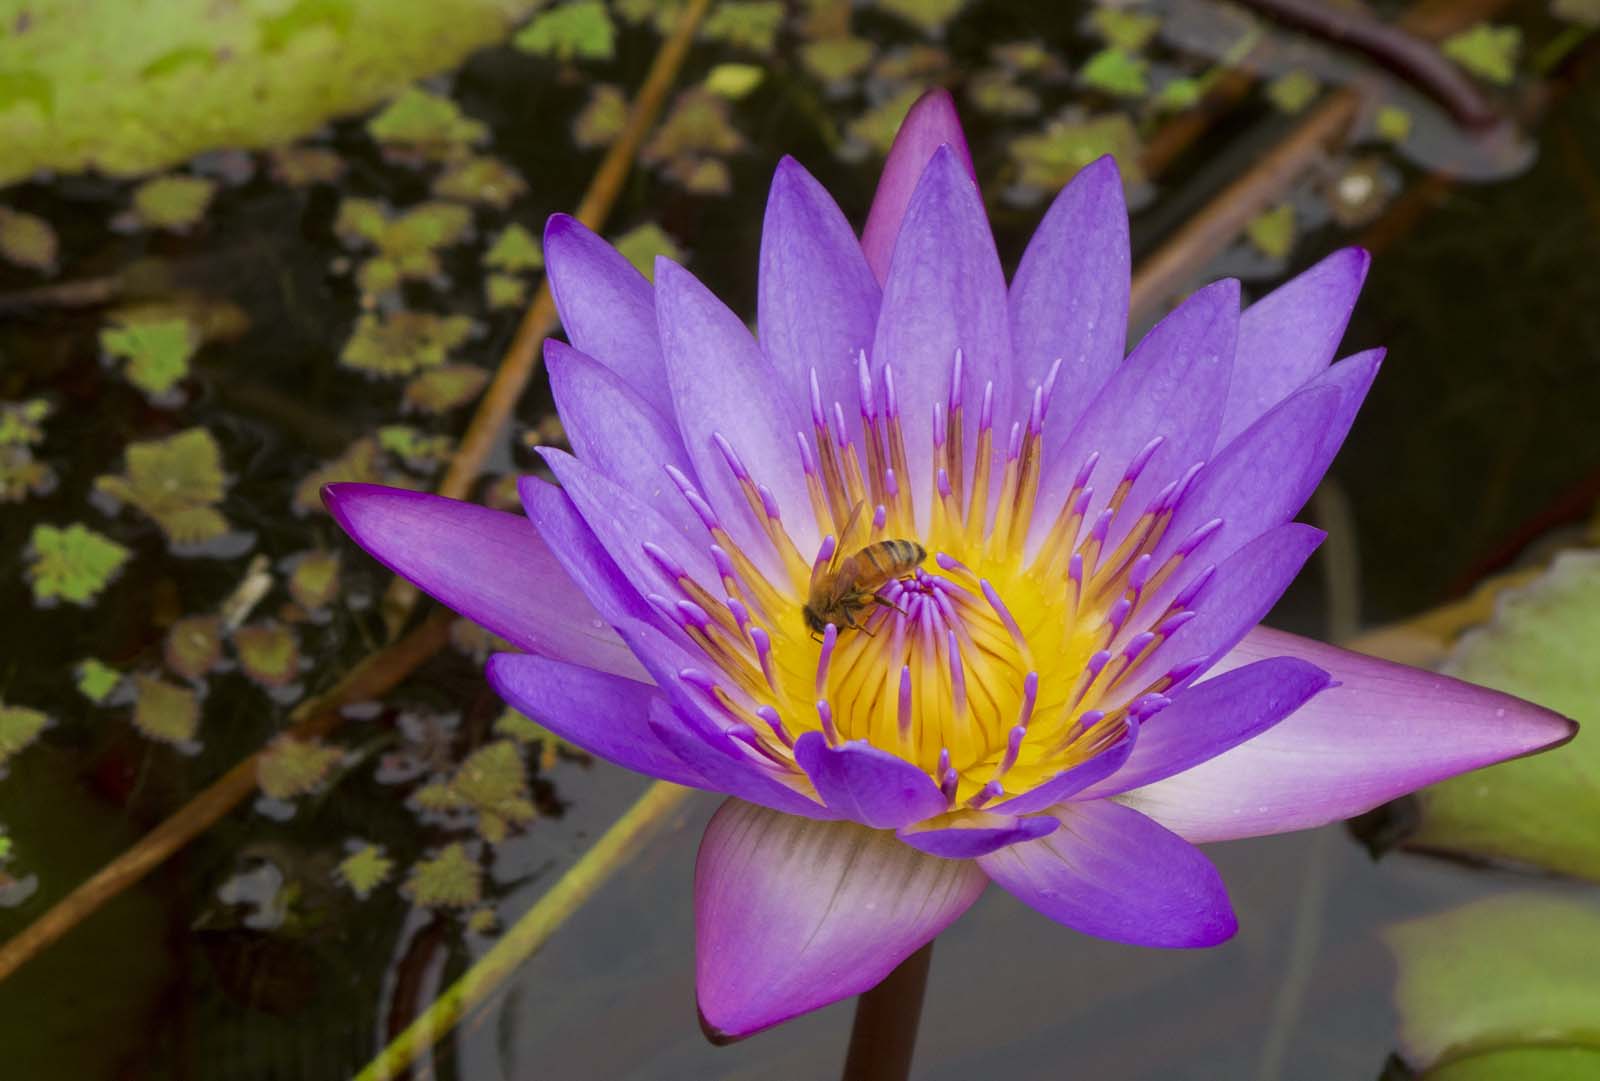
The difference in the next image is subtle. If you look at the centre of the blossom, it will appear less colourful than the image before. It may appear to be a step backward:
What I was doing was changing the balance of colours in the center to bring up some subtle shading which was barely discernable in the original. I’ll fix the drabness in the next step, but if I did that first, I’d be unable to get back the shading in the centre which makes the details there more visible.
Here I’ve restored the vibrancy of the colours and sharpened the detail. The greens were still pretty dull and there was little to work with there. I jazzed them up as much as I could without making them look too fake:
I also selectively brought out the bee by brightening only the mid-brightness areas, leaving the shadows dark. For "naturalness", I’d call this image finished.
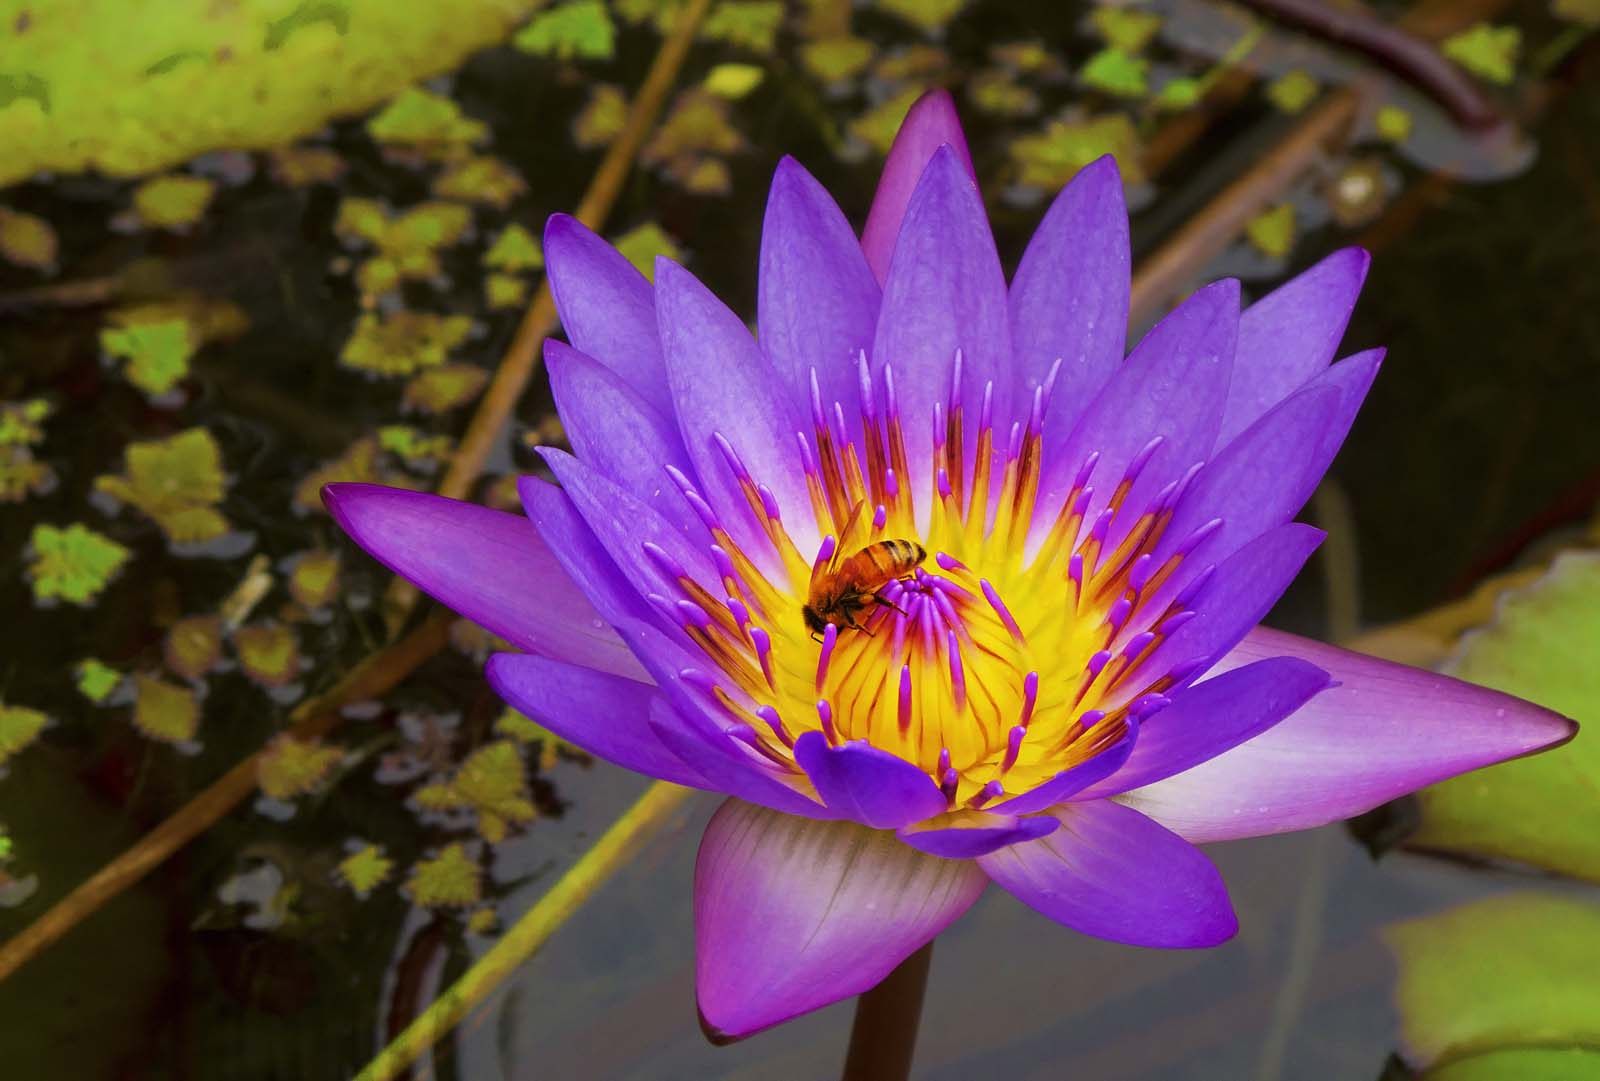
Yet, the image still lacked zing. After scratching my head for a while, I decided to abandon all caution and dip into the Artistic Filters in Photoshop. For this shot I chose Poster Edges and applied it with some restraint:
It’s easy to go too far with Poster Edges. All I wanted was just a bit more outlining of the petals and a little more definition of the detail in the centre of the blossom.
There. It’s done.
I’ve known a great number of people who had a good eye for an image and produced great pictures, but were unhappy with their images for a variety of reasons. All of these vague dissatisfactions can be evaporated by a little patience learning to use a few tools in an image editing program. One doesn’t have to spend anything to get in the game. There are lots of free choices. Though not as slick, GIMP is a good editing program that will do just about everything that Photoshop will do, at least the things that a sane person would want.
I’ve taught many people to edit their images in just a few sessions of an hour or two. Once one is "over the hump" of the learning curve, self instruction is easy, considering the huge number of free tutorials available on the web.
The initial learning process can be a little frustrating, as I do not allow one to write down keystroke-by-keystroke instructions. I have found that rapid progress and retention come from understanding the process rather than memorizing the steps. I’ve also found that a glass of nice Merlot makes the whole learning experience much more enjoyable for both student and teacher.
Imagine that.
Jade

Image by Lies Thru a Lens
Model – Jade
Year Taken – April 2013
Camera – Nikon D800E
Lens – Nikon 85mm f/1.4G
Location – Studio
Jade
Meet Jade, the daughter of a friend of mine and professional make-up artist. What can I say about Jade? She exudes a relaxed, sultry and natural look in every photo she helps create, where nothing looks contrived nor forced. Working with her is a pleasure as, as Im sure you can see in this photo, every moment captured looks like a stolen moment from anything but a photo shoot. She has a natural beauty that far surpasses any of the other models Ive worked with, looking like someone you might actually meet as oppose to someone you would look at in a photo. She is absolutely stunningly attractive, with a beautiful figure and a personality that just makes you want to get to know her more and more. We had great fun on the shoot (my second with her) and I cant wait to work with her again.
Lighting
Very simple in all honesty, with a beauty dish positioned high to my right and a strip rim light positioned behind her and to the left of frame. The light is allowed to spill from the rim light so that it falls across from her shoulder, across her chest and to her cheek; whilst keeping all else in shadow and creating and emphasising her shape.
Processing
None to be honest. The controlled dof is actually genuine as I shot this at f4, allowing for the blur to fall across her chest so that her right of arm is almost lost completely in bokeh.
Links to More Photos
If you wish to see more photos of all of these models, plus lots of lighting and other tutorials, visit my website here.
If you wish to follow me on Facebook, please click here.
If you wish to follow me on Twitter, please click here.
Silent Hill Nurse Cosplay *with tutorial*

Image by Debbie Ramone
MY Silent Hill Nurse Costume
Supplies I used: My Nurse Hat, Sharpies, A Lighter, My Dress, Brown, Black and Red Paint, Beige/Off-White Spray Paint, Coffee Gounds, Fake Blood (recipe included below), White Heels, White Stockings (two pair; control top) And A Whole Lotta Spanx.
So, every year my town holds an annual Zombie Walk. It’s fun on a bun.
Last year, I just wore a blood covered hospital gown and did my own make-up. Pretty boring, huh? Well, this year I decided to up the anti! I wanted my costume to be scary but not too difficult to make and, since I’m a huge* fan of Konami’s Silent Hill series, I thought what better place to start than a bobblehead nurse?
This is the first "cosplay" I’ve ever made. I say "cosplay" because it usually refers to anime which, though I have nothing against (seriously, you anime nuts are some of the sweetest people ever) I’m just into a lot of anime**.
Anyway, let’s start at the top with our hat: The hat itself, I bought at Micheals***. It’s a cheap, foam rubber kiddie nurse hat. See? The decals on it come right off.
So, to get the edges to look burned, I took a dark brown sharpie marker and drew around the brim and the top left and right corners. Then, to make an aged look, I took a lighter brown sharpie, marked on my fingers and rubbed them all over the hat. I did the same thing with the red. The burn marks are exactly that. Barely hold the lighter to the hat as this IS foam and WILL melt. Accentuate your burn marks with more dark brown sharpie and Viola!
Next, is our mask: Always the most time-consuming step. I used rigid wrap for the mask. YOU SHOULD USE PAPER MACHE’. Really speed is the only pro to using rigid wrap. Say, if you decide to make your mask the day of the con, you have it done and painted in about 4 hours. Other than that, it’s messy and it flakes EVERYWHERE. It WILL get your hair and EYES. If you’re not pressed for time, go with paper mache’. Much easier AND chaper to make, easier to paint, and more comfortable to wear. And NO FLAKING. But, if you’re going to use ridgid wrap, here’s how I did it. I took one of those styrofoam head forms that they use for wigs and measured my head. You need to do this to see how much aluminium foil you need to put on your form. Like, the form is 20 inches around. My head is, 24 inch around. So, I make sure the aluminium goes out to 24 inches. Then, you coat that bad boy (or girl?) in your rigid wrap. There are instructions on the box for how to use it. Make sure you have some deep grooves and creases. That way, when you go to paint it, it will look like gash wounds. That’s what we want.
After it dries, get some off-white beigey spray paint and cover the whole head. Then, take your black paint first and get it deep into the grooves you’ve made. After that, your dark brown and, finally, your red. Let that baby dry and Viola!
On to the dress. You should make the dress yourself. Or buy the cheaper lab coat offline and modify it. Much like everything else, I got all ghetto and lazy on this and bought a Leg Avenue nurse dress. Ya’ know the kind you’re supposed to wear for your boyfriend or husband or girlfriend or whateves. I don’t descriminate. But, yeah, this dress should pretty much be for sexy time only. It didn’t dye worth a shit with the tea. I ended up having to rub coffee grounds into it and it was a huge mess. After that, I used a little paint and little sharpie and singed a few places. The blood is my own classic recipe (Karo syrup + red food coloring and a little water). I also took out the hem at the bottom. FYI.
The shoes: I didn’t do much to the shoes because really, there isn’t much I can do. They’re real leather so, unless I want to shell out for some leather dye, all I can do is rub some brown paint on them to make them look a little scuffed and fling some my the blood on them.
Now, put on your stockings and you’re pretty much ready to go! I hope this isn’t too bad for my first try. I’ll say it again because it is important, this is my first try, I am not a cosplayer, I can’t sew to save my life, I’d would probably follow another tutorial. I found this one very helpful.
Thanks, everybody! Let me know what you think!
*Any and all weight jokes with be met with a swift and painful death.
**Exceptions: Ebichu and Cromartie High
***My local craft store of choice. What’s yours!?
I would like to DEARLY thank the Spanx comapny. Without you, this cotume would not be possible…really. Thank you.
Tags:image*, Jazzing, Process


0 comments:
Post a Comment